Too busy to plan a family trip to Glacier National Park? We’ve already done it for you! 3 Perfect Days In Glacier National Park
Our 3-Day Glacier National Park itinerary covers 3 perfect days–what to see and do including maps, when to visit, the best easy hikes, where to stay, tips for driving the Going to the Sun Road, along with helpful hints that we discovered along the way.
Montana’s Glacier National Park is definitely a bucket-list worthy destination for any family.
Our family loved the alpine lakes surrounded by stunning mountain peaks, the availability of hiking trails that were fairly easy for the kids yet incredibly scenic, and the high probability of actually seeing wildlife every day of our visit.
We recommend at least 3 days to visit Glacier National Park, but you wouldn’t be disappointed with more days especially if you are an avid hiker or photographer!
This Glacier National Park Itinerary offers all the details you need: where to stay, easy hikes, and tips for making your family vacation to Glacier simply awesome!
Heads Up: This post may contain affiliate links, meaning we may get a commission if you make a purchase through our links, at no additional cost to you. We don’t do sponsored posts or accept items for reviews. We only link to things we like and use personally. Read more about our philosophy.
Best Time Of Year To Visit Glacier National Park
One of the highlights of Glacier National Park is the Going to the Sun Road, so you want to time your visit for the months when it is free from snow and open to cars.
Due to its altitude and Glacier’s penchant for snow, that generally means the Going to the Sun Road at Logan Pass is only open from late June through mid-October. So, your ideal window to visit is a bit limited.
Overall, the road has historically opened in late June but there are some outlier years when it has opened as late as July 13 (hello 2020 and 2022 seasons!)
In 2025, the Going to the Sun Road opened on June 16 and in 2024 it opened for the season on June 22. The 2023 opening was June 13.
To avoid peak crowds, the best time to visit Glacier National Park is at the end of June or early September.
If visiting in July (the park’s busiest month) or August, be aware that parking is limited at many of the trailheads so you generally have to arrive super early to get a parking spot!
Glacier National Park Entrance Information
Fees and Passes
You will need a pass (good for 7 days) to enter Glacier National Park. You can purchase these in advance at recreation.gov. A private vehicle pass costs $35 in season.
If visiting more than one national park, you should consider the America the Beautiful Pass which gives you admission to national parks for a year for $80. Got a 4th grader at home? The pass is free under the federal Every Kid Outdoors Program.
Fees & Passes – Glacier National Park
IMPORTANT! For the 2026 season, the National Park Service no longer requires vehicle reservations to drive the Going To The Sun Road during peak summer season. In its place, the park will limit private vehicle parking to three hours or less at Logan Pass beginning July 1, 2026.
Logan Pass Parking
New in 2026, Glacier will limit vehicle parking to 3 hours or less at Logan Pass, a popular spot and the highest point on the Going To The Sun Road.
Logan Pass has a Visitor Center and serves as the parking area for two popular hikes in the park: Hidden Lake Overlook (moderate and recommended!) and the Highline Trail (difficult and not for the faint of heart due to narrow trail and drop-offs.)
If you plan to hike the Hidden Lake Overlook and tour the Visitor Center, 3 hours should allow plenty of time. Note that finding parking at Logan Pass will still be a challenge. You will likely have to wait for someone to leave.
The Highline Trail, however, will take more than 3 hours. In this case, you will need to purchase an express shuttle ticket to reach Logan Pass.
Glacier National Park Shuttle Tickets To Logan Pass
If you’re planning on hiking the Highline Trail, you’ll need to reserve a shuttle ticket to take you to Logan Pass.
Glacier National Park shuttle tickets will be available during two booking windows.
1) A portion of shuttle tickets will be available 60 days in advance, starting on May 2, 2026, at 8 a.m. MDT, on a rolling basis.
2) The remaining shuttle tickets will be available at 7 p.m. MDT for next-day entry starting June 30.
All shuttle tickets will be available on a first-come, first-served basis on Recreation.gov or through the Recreation.gov Call Center (Reservation Line: 877-444-6777).
Visitors will need to set up an account on Recreation.gov to obtain reservations. The only cost associated with booking a ticket is a $1 Recreation.gov processing fee per ticket.
Shuttle tickets are not available for purchase inside the park.
Shuttle tickets will be validated prior to shuttle boarding and a photo ID may be requested to verify that the ticket purchaser is present. Shuttle tickets are non-transferable.
Passengers aged two and up require a ticket to board Glacier National Park shuttles.
The shuttles will operate from both east and west areas of the park. See the website for shuttle routes, boarding times, and stop locations for the 2026 season.
Where To Stay When Visiting Glacier National Park
For specific recommendations and more detailed info on lodging options, see our “Where To Stay When Visiting Glacier.“
To avoid driving long distances to see everything, it’s ideal to arrange lodging in the park. If you can swing it, stay on the west side for 1-2 nights and then stay another 1-2 nights on the east side.
All that being said, I really like both sides of the park and would take ANY lodging I could find inside the park.
Lodging- West Side of Glacier
You’ll have the best chance of finding lodging near the west entrance to Glacier simply because there are more lodging options here as compared to the east entrance at St. Mary.
The west entrance to Glacier is the most popular entrance to the park. If amenities are important to you, the western side offers more tourist-oriented options in the towns of Whitefish and Columbia Falls, MT.
We stayed in Whitefish, MT at Whitefish Riverfront Hotel (formerly Pine Lodge and loved it. This quaint mountain town also offers a variety of vacation rentals (VRBO). See hotels in Whitefish, MT here.
In Columbia Falls, I would recommend Cedar Creek Lodge or Wonderstone at Glacier. See more hotels in Columbia Falls here
Lodging- East Side Of Glacier
The St. Mary entrance on the east side of Glacier National Park feels quieter and more remote. While it still gets plenty of visitors, it’s typically less crowded than the Apgar Village area of the park.
Lodging at St. Mary Village can’t get any closer without actually being inside the park. It also has an onsite restaurant.
You’ll find a variety of cozy cabin rentals in the area as well (see VRBO listings ) but no chain hotels.
My first choices for lodging in the park are on the east side at the park’s Many Glacier Hotel or Swiftcurrent Motor Inn. We have also loved Rising Sun Motor Inn or Village Inn at Apgar (on the lake!). Again, I would take whatever I could get to stay inside the park!
See my Where To Stay In Glacier for more lodging tips and recommendations in West Glacier and East Glacier.
“At A Glance” Glacier Itinerary
This 3 day Glacier Itinerary takes you to 3 different areas of the park. It assumes you are starting from your lodging in the west side of Glacier.
Day 1- Explore Apgar Village, McDonald Lake, and the Trail of Cedars/Avalanche Lake hike. (Overnight lodging in west side of Glacier)
Day 2- Drive the Going to the Sun Road to arrive at Logan Pass. Hike either the Hidden Lake Overlook Trail or the Highline Trail (strenuous- need shuttle ticket). Afterwards continue to St. Mary Lake area and walk the Sun Nature Trail to Baring Falls. (Overnight lodging at either east side or west side is preferable. Rising Sun Motor Inn would be a great choice.)
Day 3– Visit St. Mary Visitor Center and take a quick stroll on the Beaver Pond Trail. From there, drive to the Many Glacier Area with for a boat tour with optional hikes to Grinnell Lake and Grinnell Glacier. (Overnight lodging in east side of Glacier)
A Note About Hiking In Glacier
Unless otherwise indicated, all of these family-friendly hikes are less than 5 miles roundtrip with reasonable elevation gain and offer the biggest “wow factor” for your effort.
Also, be sure to check the National Park’s trail status webpage before you head as trail closures can occur due to either weather or bear activity.
IMPORTANT! BRING BEAR SPRAY! HIKE IN GROUPS IF POSSIBLE.
Parking At Trailheads: A note about parking at trailheads. You have to arrive early. 8am would be considered late.
Glacier Park Shuttle: You also have the option of taking the park shuttle from Apgar Visitor Center to popular trailheads along the Going To The Sun Road like Avalanche Lake and Logan Pass.
We did not take the shuttles as we were concerned about the wait time (especially the return shuttle!) with our young children. You’ll have to decide what’s best for your family.
Day 1- Lake McDonald Area

Day 1 Morning– Trail of the Cedars/Avalanche Lake
First things first. GO EARLY! As mentioned above, it’s difficult to get a parking spot, so the earlier you arrive the better. Or, arrive later in the afternoon.
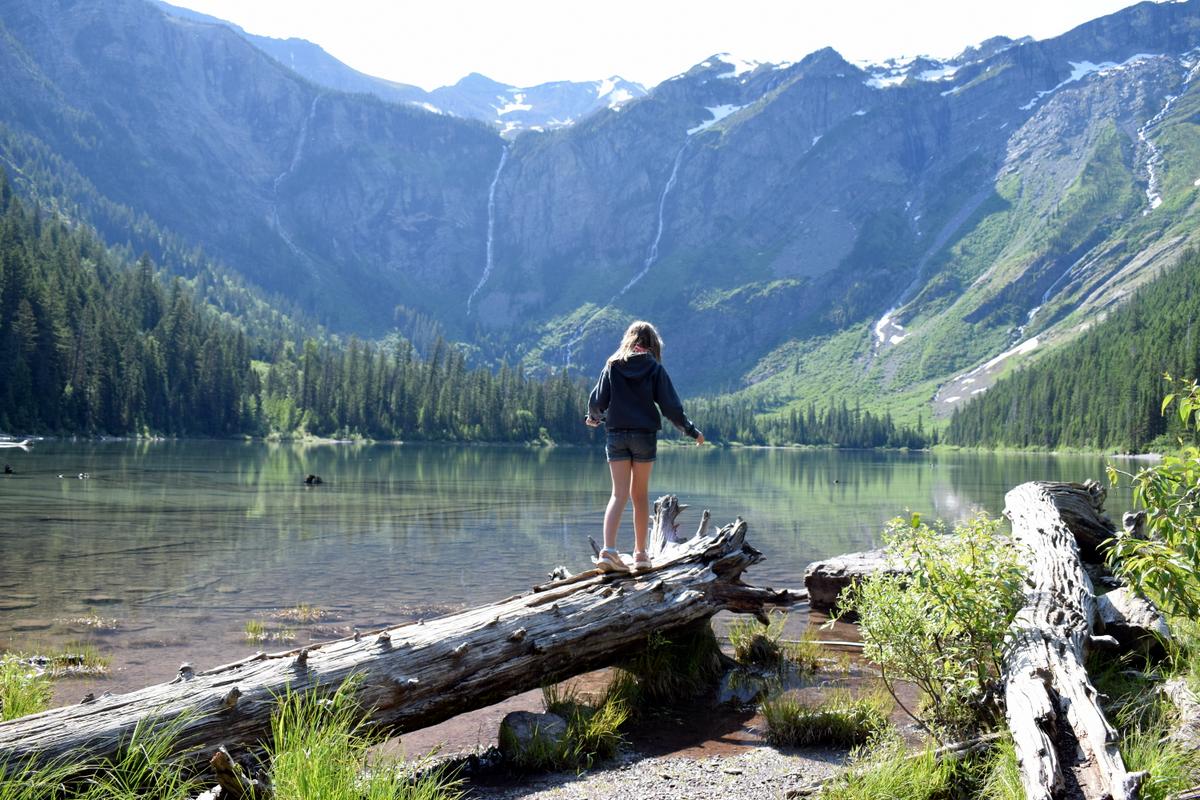
You can make this a short 0.7 mile walk along the Trail of Cedars boardwalk (a wheelchair accessible loop) or extend it by continuing to Avalanche Lake (which I recommend).
The 4.6 mile roundtrip hike to Avalanche Lake was absolutely gorgeous with its green leafy ferns, old-growth cedar and hemlock trees, and a roaring creek.
Reaching Avalanche Lake, surrounded by steep cliffs and waterfalls, was simply an added bonus. For us the “journey” of this hike was just as enjoyable as the end destination.
Tip: If you’re not up for the entire hike to Avalanche Lake, make sure to at least walk the first 100 yards of it to see the beautiful views of Avalanche Creek.
Day 1 Morning- Option: Rocky Point Scenic Trail
If you were unable to get a parking spot at Trail of Cedars, or you are looking for a way to escape the majority of the crowds near Lake McDonald, walk the easy 2.2 roundtrip Rocky Point Scenic trail near Fish Creek Campground.
It follows the shoreline of Lake McDonald and offers great views at Rocky Point. Along the way, you can picnic by the shore of Lake McDonald, skip rocks, or wade in the freezing cold water.
Day 1 Afternoon- Apgar Picnic Area
We happened upon this spot accidentally and were pleasantly surprised by the wonderful views of Lake McDonald. You’ll find several short spur trails to the water’s edge.
This would be a good place to drop in a kayak too. If it’s not too windy, you can rent a kayak at Glacier Outfitters in Apgar Village to explore Lake McDonald.

Day 1 Afternoon– Apgar Visitor Center
If you need hiking information, maps, etc., make a stop at the Visitor Center. You can also get your Junior Ranger booklet here for the kiddos to complete to earn their Junior Ranger Badge.
Day 2- Going To The Sun Road and Logan Pass
Driving Glacier National Park’s Going to the Sun Road is the classic “must do” experience when visiting. This infamous and incredibly scenic 50 mile road connects the park’s eastern and western sides, passing numerous waterfalls and climbing to Logan Pass at 6646′ elevation and 32 miles from the west entrance.

Logan Pass is where you’ll park to hike the Hidden Lake Overlook or Highline Trail and/or visit the Visitor Center.
Parking is difficult as this is one of the most popular spots in the park. The National Park Service website states that the lot is often full by 8am.
For the 2026 season, parking time is limited to 3 hours at Logan Pass. If you need longer than that (if hiking the Highline Trail), you need to get a ticket to take the park shuttle to Logan Pass.
After reaching Logan Pass, the road eventually brings you back down to the valley and St. Mary Lake.
The NPS website offers a live webcam of the Logan Pass parking lot if you want to take a look.

To drive the entirety of the Going to the Sun Road without stops would take about 2 hours.
Best Turnouts On The Going To The Sun Road
There are a number of turnouts on the Going To The Sun Road. We particularly enjoyed the spectacular views from the turnoff just after Lick Creek but before the first tunnel (driving east).
Don’t miss your chance to see a glacier from the Jackson Glacier Overlook.
This helpful website lists the best turnouts on the Going to the Sun Road.
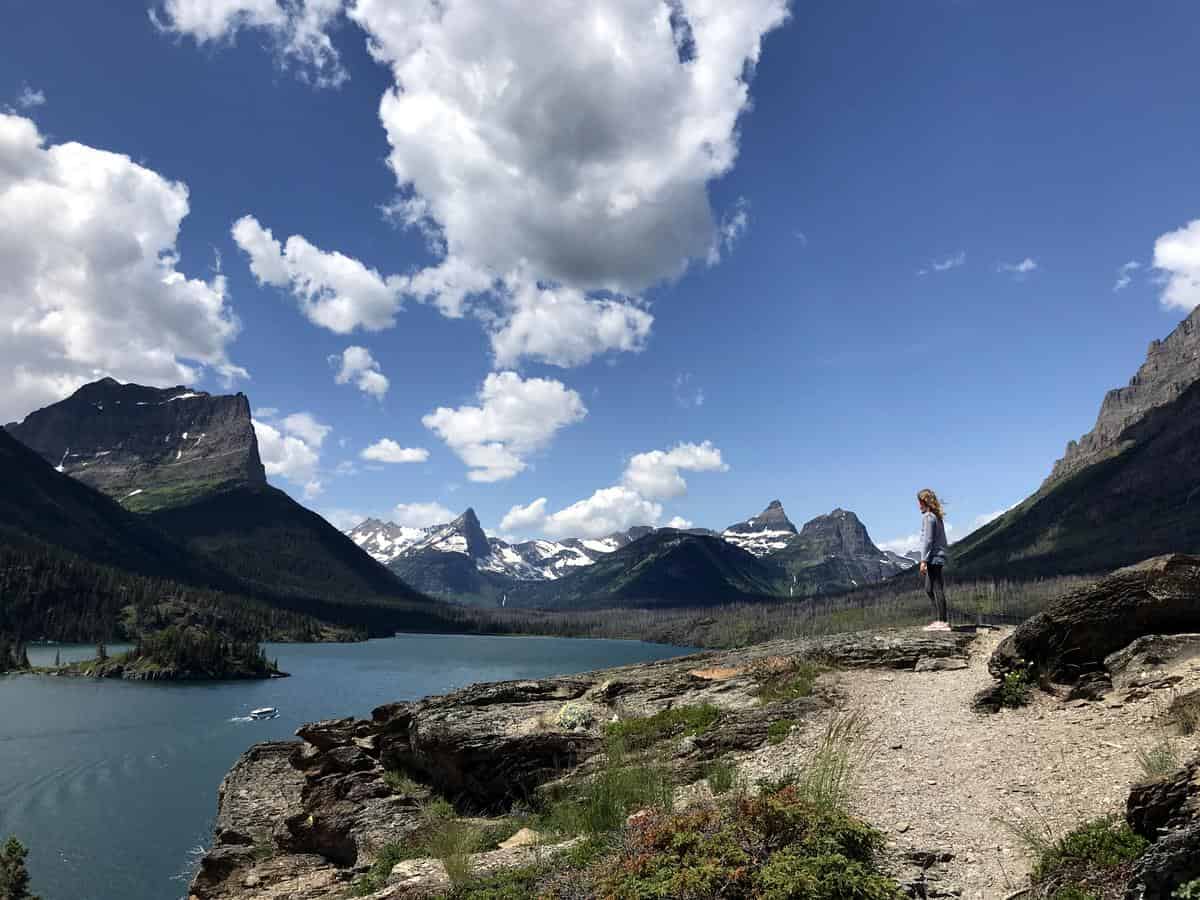
Day 2 Morning- Hidden Lake Overlook Trail
The Hidden Lake Overlook Trail follows a boardwalk behind the Logan Pass Visitor Center to reach an overlook of Hidden Lake at 1.5 miles for a 3 mile round trip hike.
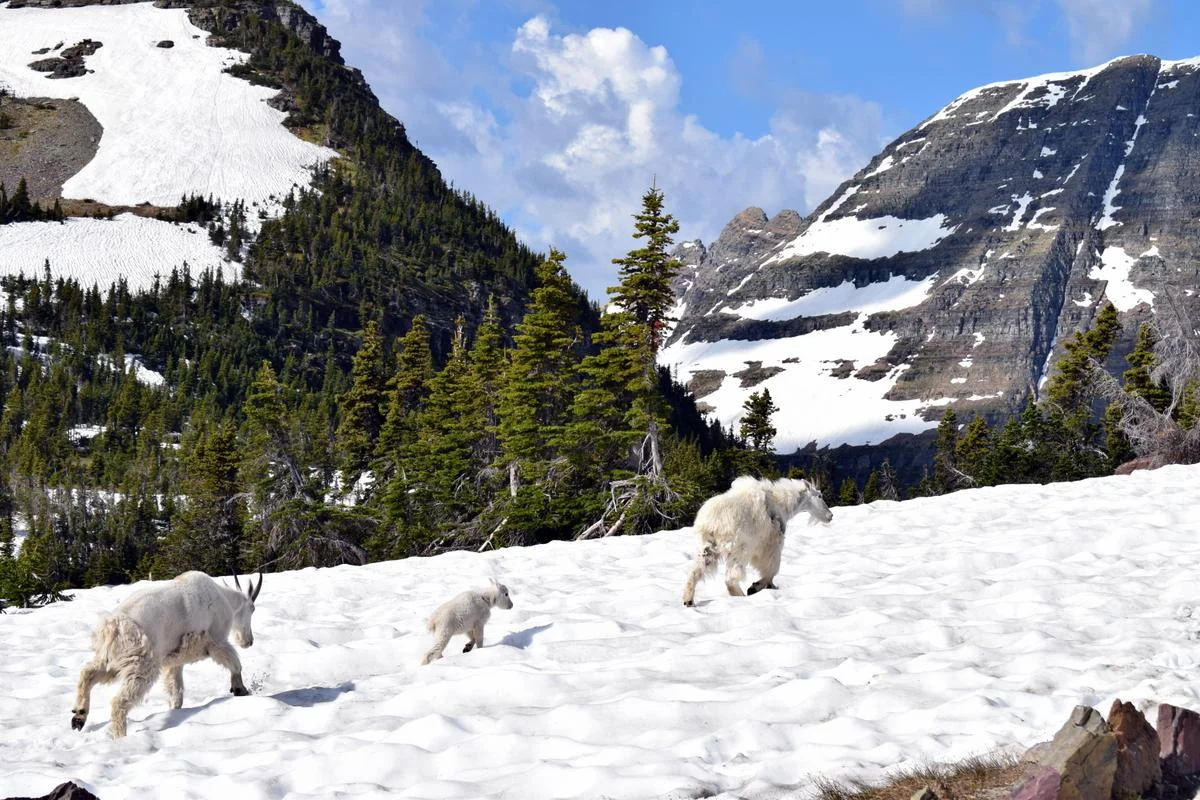
This was one of our favorite hikes because of its beautiful vistas and the high probability of seeing mountain goats along the trail. Which we did!
Tip: Hike 100 yards past the overlook to escape some of the crowds and savor the views. Know that parts of the trail may still beccovered in snow making for some slippery and fun walking!


Or the Highline Trail (more challenging hike)
Highline Trail (across the street from Logan Pass parking area)- A bucket list hike leading from Logan Pass to Granite Park Chalet. The trail follows the Garden Wall ridge and the continental divide for most of its length.
Most hike the 7.6 mile section from Logan Pass to Granite Park Chalet, but you can go further.
You’ll find spectacular views in all directions. Note that this trail can often still be closed due to high snow pack even when the Going To The Sun Road is open.
The trail has some steep drop-offs on some short sections of the trail, so keep that in mind if hiking with young kids or if you have a fear of heights.
If hiking the Highline Trail, you need to get a ticket to take the park shuttle to Logan Pass. Parking at Logan Pass is limited to 3 hours.
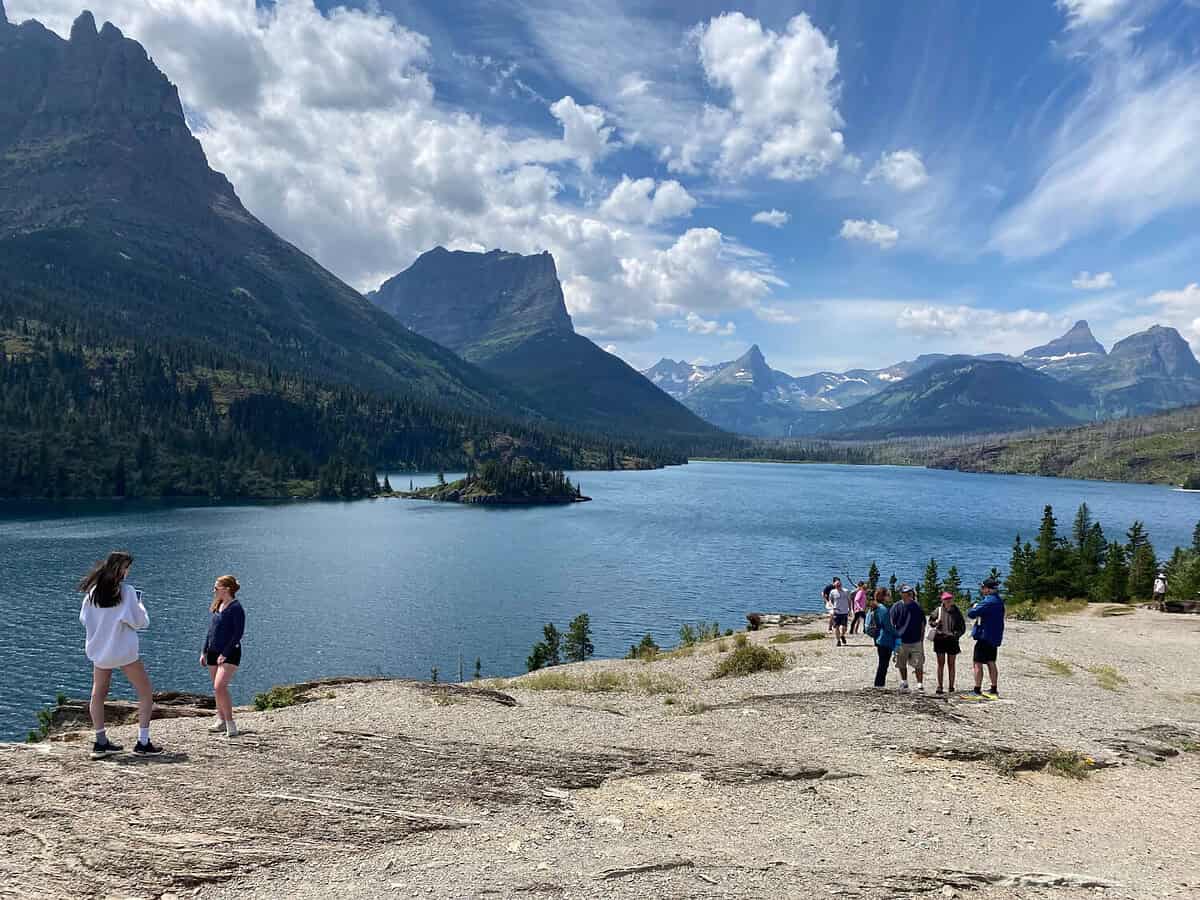
Day 2 Afternoon- Sun Point Nature Trail to Baring Falls
From Logan Pass, it’s a 15 minute drive to the waterfall trails near St. Mary Lake.
The Baring Falls hike begins from the Sun Point parking area, located at the end of a short spur road off the Going To The Sun Road.
Once parked, go to Sun Point for magnificent views. My daughters loved this spot with lots of rocks to scramble up, big views of St. Mary Lake, and it’s only a short walk from the parking area.
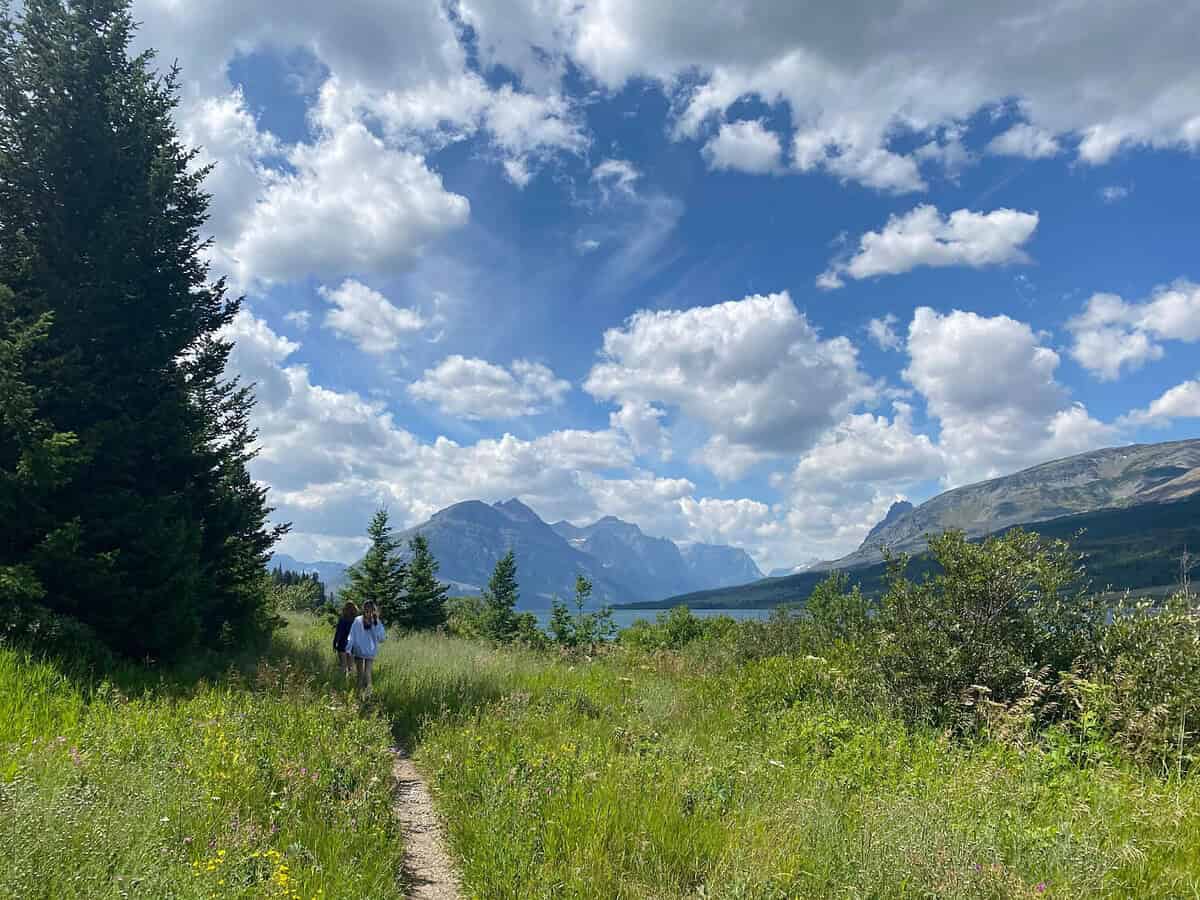
After hanging out, it’s just 0.7 mile walk along the Sun Point Nature Trail and St. Mary’s shoreline to Baring Falls.
For a longer hike, continue to St. Mary Falls and Virginia Falls
From Baring Falls, you could continue on the trail 1.9 more miles to reach St. Mary Falls and 0.8 more miles beyond that to Virginia Falls.
Or, you can park at the St. Mary Falls trailhead for a 1.2 mile hike to St. Mary Falls with the option of continuing on 0.8 miles to Virginia Falls for a 4 mile roundtrip hike.

Day 3- Explore The Many Glacier Area
Day 3 Morning- St. Mary Visitor Center
The St. Mary Visitor Center was our favorite one. You can watch a short film on the history of Glacier National Park and view the exhibits before making your way to the historic 1913 Ranger Station which sits adjacent to the trailhead to Beaver Pond.
Day 3 Morning- Beaver Pond Loop Trail

The Beaver Pond Loop Trail (3.3. miles roundtrip) is a good one to combine with a visit to St. Mary’s Visitor Center.
If you haven’t already, be sure to pick up a Junior Ranger Packet for the kiddos while you are here.
Rather than start the trail at the Ranger Station for a clockwise loop, we began the trail at far end of the parking lot at the Red Eagle Lake Trailhead.
After walking just 0.25. miles, we took a spur trail to a pebbled beach along St. Mary Lake.
It was 9am in the morning and no one was there (which was an amazing gift given the crowds we’d seen at the more popular trails).
We ended up staying for an hour, skipping rocks and taking in the views, and never even finished the hike!
Honestly, one of my favorite memories of our trip.

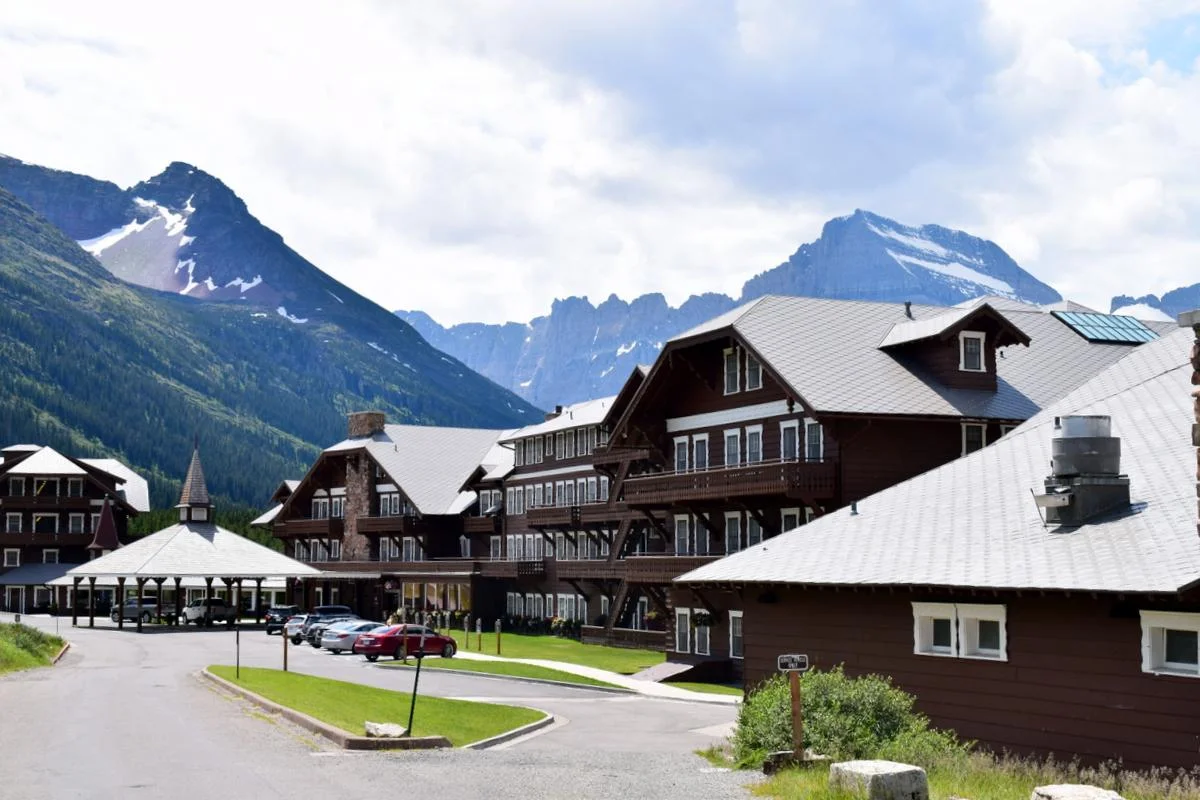
Day 3 Afternoon- Visit The Lobby Of Many Glacier Hotel
Built in 1914, the swiss-style Many Glacier Hotel is the largest and grandest of the hotels in Glacier National Park.
Even if you don’t stay here, you should go inside to browse the gift shop, grab a bite at Heidi’s Snack Shop, and take in the views from its beautiful lobby.

Day 3 Afternoon- Swiftcurrent Lake Boat Tour
We loved the boat tour on Swiftcurrent Lake and adjoining Josephine Lake. The boat tour takes about 1.5 hours and requires a short 1/4 mile walk to access the second boat of the tour which takes you across Lake Josephine with views of Salamander Glacier.
It’s a fun informative tour and a pleasant way to see the backcountry of Glacier National Park from the water. Highly recommend it!
Tip: Remember to bring your binoculars to spot wildlife from the boat.
I recommend reserving the boat tour months in advance to guarantee a spot on the boat. You can also just show up and hope to get a spot from a waiting list (which many did successfully).

If You Have Time: Combine The Boat Tour With Grinell Lake or Grinell Glacier Hikes
The boat tour is also a convenient way to shave miles off your hike to either Grinell Lake (easy) or Grinell Glacier (strenuous), both of which are accessible by disembarking the boat at the upper boat dock on Josephine Lake.
- Grinell Lake Hike is an easy 2.2 miles roundtrip after disembarking the boat. Otherwise, it’s a 6.2 mile roundtrip hike from the Many Glacier Hotel.
- Grinell Glacier Trail– This strenuous hike offers outstanding views of emerald blue Grinell Lake and a closeup view of Grinell Glacier. It is 7.5 miles roundtrip after disembarking the boat at Lake Josephine. Otherwise, it’s 12 miles roundtrip from the Many Glacier Hotel.
If you decide to hike, the boat operator will you give you a return ticket along with return times to shuttle you back to the Many Glacier Hotel.

Day 3 Afternoon- Optional- Swiftcurrent Nature Trail
If you were unable to go on the boat tour, you can always stretch your legs on the nature trail that encircles Swiftcurrent Lake. You’ll find the trailhead near Many Glacier Hotel.
It is a flat, easy stroll with benches scattered throughout. A perfect spot for photographs. You can also connect to Josephine Lake to make it a “figure 8” hike.
Looking For A Challenging Hike in Many Glacier Area? Iceberg Lake Trail
Iceberg Lake– You’ll get plenty of amazing photos at Iceberg Lake. Even in late July, you’ll find ice floating in this alpine lake. It’s also a good hike to see wildlife (bring bear spray!
Day 3 Afternoon- Option: Fishercap Lake
Fishercap Lake Trail is another short and easy trail in the Many Glacier area near the Swiftcurrent Motor Inn.
This super short 1/2 mile roundtrip hike offers your best chance to see a moose in the shallow water of Fishercap Lake.
We weren’t lucky enough to see one on our visit but still enjoyed a relaxing walk to the lake.
General Tips For Your Trip
- Buy bear spray
- Bring a backpack to carry snacks, maps, and drinks when hiking
- Have good sturdy shoes and sandals for the water
- Purchase a cooler or pack a soft-sided cooler for picnics
- Remember there is no cell service in the park and limited WiFi in national park lodging
- Pack for cold temps in the morning and hot temps in the afternoon–layers are key. During the first week of July, we saw lows in the upper 40’s and highs in the low 70’s.
- Bring binoculars
- Check trail status and road status before starting your day
- Make sure your car is fueled and pack a picnic and trail snacks. Food is limited inside the park and gas stations are non-existent. You’ll find dining in Apgar Village, Lake McDonald Lodge, Many Glacier Lodge, and Rising Sun Motor Inn.
Glacier National Park Website
Glacier National Park’s Official Website has maps, road and trail status information, live parking lot cams, downloadable maps, newsletters, Junior Ranger packet, and more!
Happy Trails!
Enjoy your trip to one of the most beautiful national parks. Your vacation will be simply awesome! -Amy
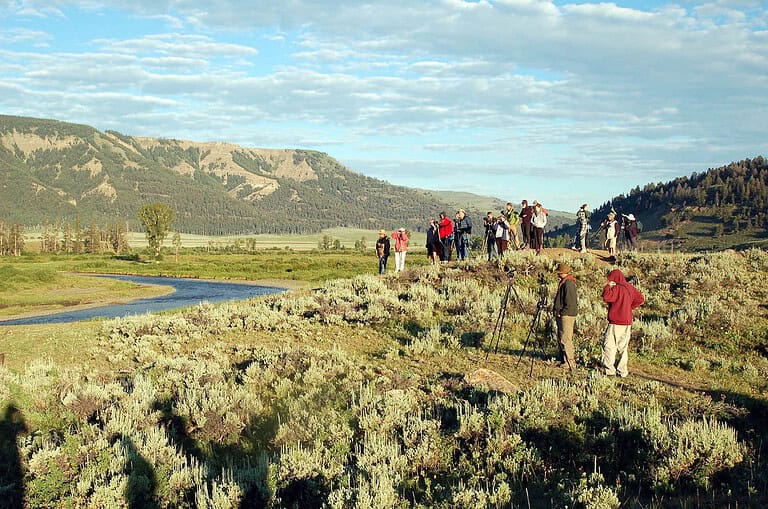
Also visiting Yellowstone National Park? Too busy to plan a vacation? See our 5 Days in Yellowstone Itinerary for all the details and day-to-day plans.